Using Images in app_offline.htm
It is often desirable to put a website in maintenance mode. The can help ensure that clients do not access the website while new code is being deployed or changes to other components are being done.
ASP.NET (starting with 2.0) provides a very convenient way to put an entire web application into “maintenance” mode. The knowledge of this nifty little feature was made public back in 2005 by Erik Porter and Scott Guthrie on their blogs.
Basically, if you place a file with this name in the root of a web application directory, ASP.NET 2.0 will shut-down the application, unload the application domain from the server, and stop processing any new incoming requests for that application. ASP.NET will also then respond to all requests for dynamic pages in the application by sending back the content of the app_offline.htm file Scott Guthrie
This cool little trick comes with limitations. You cannot reference images in this file which are located under the same website you’ve just put into maintenance mode. Two of the easiest ways to work around it is to:
- Host your images on another website.
- Limit your “maintenance” message to HTML/CSS only.
But what’s fun in that.
This is where the Data URI scheme comes into play. To quote the Wikipedia article
The data URI scheme is a URI scheme (Uniform Resource Identifier scheme) that provides a way to include data in-line in web pages as if they were external resources. This technique allows normally separate elements such as images and style sheets to be fetched in a single HTTP request rather than multiple HTTP requests, which can be more efficient.
Images
Now that we know that there is a way to “embed” certain resources, let’s see how we can leverage it for our app_offline.htm file.
Start with a basic HTML file:
1
2
3
4
5
<center>
<h2>You Shall Not Pass</h2>
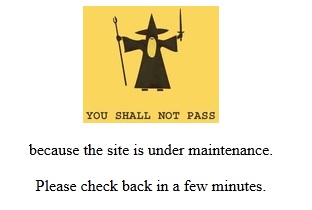
<p>because the site is under maintenance.</p>
<p>Please check back in a few minutes.</p>
</center>
But that’s just plain. How about we add Gandalf to spruce it up a bit. We’ll be using CaptainD’s you shall not pass for this example.
Encode It
First thing to do is to convert our image to a Base64 encoded string. You can use an online tool to do this conversion, such as Web Coder Tool’s converter. Just keep in mind that the length of Base64 encoded string will increase as the image size increases.
1

<img alt="" src="data:image/jpeg;base64,/9j/4AAQSkZJR...9yP//Z" />
Note: Base64 content is truncated for brevity.
Embed It
Final version with the embedded image.
1
2
3
4
5

<center>
   <img alt="You Shall Not Pass" src="data:image/jpeg;base64,/9j/4AAQSkZJR...9yP//Z" />
   <p>because the site is under maintenance.</p>
   <p>Please check back in a few minutes.</p>
</center>
Result
Caveats
Not all browsers fully support Data URI scheme. Take a look at the Web browser support section of the URI Data scheme Wikipedia article for completed details.
Know your target audience. If you know that your audience is using a compatible browser, feel free to experiment with this technique. Otherwise, stick to text only or externally hosted images.